Printfriendly

Popular Posts

Showing posts with label DIY. Show all posts

Epsom Salt Snowflake Craft


The best way to decorate during the holiday season is to do it as cost friendly as possible. This one is a little messy, but worth it. Hey, it could be worse and involve lots of glitter. Glitter is great, but so much more messy and it spreads like crazy. The good thing about epsom salt is you can add more and if it ends up being too much, then it dissolves in water. When you sweep and then miss a few pieces of epsom salt, the mop will pick it right up. Clean floors once again. Okay, back on subject now. I was going to just leave the snowflakes plain and put them on the garland above my arch way to the kitchen from the living room, but realized I had nothing that says Noel. It just was too plain for me, so I jazzed it up. 

Throwback share- When I was a teenager, I had dated this guy for many years and his mom was always doing really funny goofs here and there. She had this beautiful 4 piece white angel set that had the letters NOEL on it and she had arranged it NEOL on the fireplace mantel. So when something was said about it not being spelled right she swore it was right and she eventually saw things the right way and fixed it. It is always good to be able to laugh at yourself when you do something silly and she did just that. 


We did an epsom salt and glitter ornament last year:
http://onecreativeprocrastinatinggal.blogspot.com/
19 more handmade ornaments on this post!

Noel means Christmas in French! You probably already knew that, but I forgot and I had to Bing it. Sometimes I don't know what I would do without a search engine to answer my gazillion wonders in a day. 


What you need:
Mod Podge- Glossy
Epsom salt
Plastic snowflakes
Paintbrush 
Paper plates 
Newspaper
Paper towels 
Large glass gems/bead
Lettering or stencil of your choice
Permanent marker
White paper bag
Hot glue- glue gun

So as my kids watch the Scooby Doo Haunted Holidays, I worked on this project. This project was super easy. Most of the above items you can find at the Dollar Tree. I got the snowflakes a few years back, so I am not sure if they sell those anymore, but I am positive you can find a different type of snowflake there. The snowflakes as is was okay, but they were just so cheap looking. I wanted sparkle and a snowy feel and liked the effect epsom salt gave.

Lay out your snowflakes on newspaper. Put a snowflake at a time on a paper plate. Paint your snowflake with mod podge on the front and back, then sprinkle your your epsom on. You should have enough excess salt to slide and gently shake back in forth to coat the bottom, if not just sprinkle more. I did this over the sink to prevent epsom salt from going everywhere.

*You can only sprinkle epsom salt on AFTER you paint the mod podge on. If you try to paint over the epsom salt with the mod podge, it will melt and create a big watery mess and you will have to start your project over. I tried to make candle sticks with mod podge and epsom salt last previously and it just did not work out at all. 

Hang it to let it dry completely. Once it is set and dried, you can get your stencil ready. If you have super neat or pretty handwriting, that is great too. I happen to not have the best penmanship, so I used a stencil. I think I got mine for a buck at a local store called Mighty Dollar...another everything is a dollar store. Fantastic by the way and huge. You can use any light paper of your choice, I used a white paper bag. Stencil your letters on and paint a little mod podge on the back of the glass gem and attach your letter to the back...the side you wrote on will go directly on the bottom of the gem/bead. I didn't wait. After I pressed my letter on, I squeezed a little dot of hot glue on the center of the snowflake and attached my monogrammed letter on. It dries pretty quickly, so that completed my project. I hung them up and they are a great addition to the rest of our decorations this year. Have a wonderful day. 

*I will be adding lots maybe even multiple posts a day in the next week....the Christmas spirit has hit and my kids get out of school today for 2 weeks and I have a huge list of things to work on with them. See and you thought I was abandoning my craftastic posts.  Have a great Friday!

Happy Holidays!


Glass Angel Snow Globe & 24 DIY Ornaments

12 days of Christmas, that would be today...how can you just go with 12 things? I couldn't, so take a peak at 25 creative, inexpensive and enjoyable crafts and creations for this holiday season. Make it for you own tree or someone else's tree. Either way, you will be making unique holiday creations that can be treasured forever. 


What a fantastic gift idea! It is never too early to start planning gifts. Handmade gifts are the best in my opinion. Not only are they more cost efficient, but they are made with heart. We made one with gold and white glitter, baby blue and silver glitter and red with gold glitter...for a few staff members at my daughters school 2 years ago. 
  • $1 glass angel ornament 
  • $1 gold wired ribbon
  • Fine glitter
  • Epoxy 
  • Cleaned out dip jar- ours was a spinach dip jar

I have seen lots of snow globe jar how to's using baby oil and I tell you, that just was not the case for us. It was messy and it caused the glitter to stick to the lid and it just was unpleasant. We skipped the baby oil. I glued the angel to the inside of the lid (make sure you angel fits before you glue it) and let is dry and set completely before doing anything else. Glitter is so messy, but we love it and it just is the most awesome decor accessory you can add to any holiday creations....so I didn't measure. I poured some and then sprinkled some more until it was the look I wanted it to be. We used Epoxy to secure the lid after we got our desired glitter fall look. 

*The epoxy gave us a few more minutes to secure and make sure there were no leaks.
*The hot glue dries too fast and just didn't work well with the lid nor did the super glue...dried too fast. 

Sometimes it takes a few times of making sure the lid was on all the way. It was a process of elimination with the leaking jars to finally settle with epoxy. We glued one strip of gold wired ribbon around the lid and make our bow and attached it right to the front. 

Here are a few other handmade gifts and holiday creations you may love: 


We made these as our teacher and principal gifts last year.
http://onecreativeprocrastinatinggal.blogspot.com/

http://onecreativeprocrastinatinggal.blogspot.com/


http://onecreativeprocrastinatinggal.blogspot.com/

http://onecreativeprocrastinatinggal.blogspot.com/


Here is the story of how we celebrate 12 days of Christmas in our home and a few of the things we do. Get the story. (For some reason the link button is not wanting to work with the photos like normal)
http://onecreativeprocrastinatinggal.blogspot.com/


DIY~ Invisible Bookshelf

I was browsing through the new Pottery Barn catalogs scanning for project ideas, I saw some covered books and I loved them.   I plan on doing more in the future and that will be a future post.  It was super easy and I love the look.  I decided that I was going to try out the covered book and then turn it into an invisible bookshelf. : )


Faux Mercury Glass Candle Holder Tutorial

Okay guys, I wanted to show ya'll how I did the Faux Mercury on some glass jars when I was working with the glass bells.  The bell didn't turn out exactly how I wanted it to but it gave me a chance to turn it into my own.  A more open candle hold turned out beautifully. 

http://onecreativeprocrastinatinggal.blogspot.com/


Clean out what you are wanting to spray.  I practiced on a empty baby food jar and a empty fruit jar. 

 -I grabbed a candle holder from the $1 tree for my keeper.
-A can of Looking Glass Mirror spray
- 1 oz spray bottle with 50/50 vinegar-water mix
-paper towel, soft cloth or q-tip

Everything I have read says spray it....but be careful because it is super thin and it runs.  No room for error.  I don't see how every person I have ever seen that has recreated this look is perfectly clean.   I suppose maybe it is a skill/experience thing, but before I was done my hand looked like I was turning into the tin man.  Learning experience for sure.  With the bigger holder, spraying further away produced the best effect. 

Here is the process:

This is after 2 layers of spray.  See my silver hand?  You should have seen it by the end of all the spraying.
http://onecreativeprocrastinatinggal.blogspot.com/

 This is what it looks like as it is drying. As soon as it dries spray again.  Spray about 8-10 times.
http://onecreativeprocrastinatinggal.blogspot.com/

 Completed spray.  The mirrored look is really pretty too.  As soon as it dries spray with your 50/50 solution.
http://onecreativeprocrastinatinggal.blogspot.com/

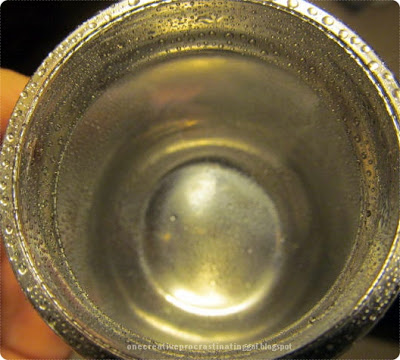
50/50 water-vinegar spray & a dampened cloth/paper towel with the solution.  Let it sit for as long as you let it dry and softly rub your dipped paper towel across the surface in order to get your effect. Let it sit for a min or two then start.   If it is not the effect you are wanting then do another spray and do it again.  Bigger beads=bigger effect.

 I was happy with this effect with the bigger bubbles.
http://onecreativeprocrastinatinggal.blogspot.com/

Give 1 to 2 more sprays to give a nice effect so it is not open spots.
http://onecreativeprocrastinatinggal.blogspot.com/

I am sure you noticed that there are 3 different jars.  I guess I had inhaled too much paint fumes and it seriously made me really loopy and I got a super bad headache. I sprayed outside and went back in after it dried but the smell is super strong so if you try it stay outside. It was super cold and I was being my normal self...a procrastinator.   I AM working on that and am seeing some progress.  I wanted the bells finished before my daughter returned to school for teacher/principal gifts which was the next day; then Christmas break. However, I do plan on doing this again in the future when it gets warmer out.  I love the look of it.  I have a feeling that it can only get better from here...right.

Copyright © Consider Me Inspired | Custom Blog Design by Lilipop Designs