Printfriendly

Popular Posts

Showing posts with label repurposing. Show all posts

So Many Fun Uses for Glow Sticks

I snagged glow sticks last year for .25 a pack after Fourth of July at one of the sales.  I love a great deal and am almost always suckered into the little after holiday sales.  I try to wait until the 90% off but often hit it at the 75% off too because most of the time there is hardly anything left by time 90% comes.  After I bought them, they were put in a box and pulled back out this year unbroken.  The little tubes they come in are pretty sturdy. 

What did we do for fun with the kids on the Fourth?  We went to a firework show and dinner the night before at my moms church; the kids shot a few fireworks with my sister and brother; we went for a walk with the kids after we shot fireworks; cooked out and enjoyed family time.  By the way, I have 3 sisters and 1 brother.  My sister Brandy is 2 years under me and my brother David is 2 years under her; then we have a 18 year old sister and a 7 year old sister. 

Glow jars are just so neat.  Glow stick are bendable and easy to shove into different containers.  LIKE-  empty baby food jars and lids to other jars.  Repurposing at its finest. :) The lids below came from the square glass jars with the hollow glass bubble lids. They had the plastic seal, but they were aged and came undone easily.  My first idea was to cut open large glow sticks and pour it into jars, but then I found that it was bracelets instead of a large glow stick in each package.  I plan on trying the larger ones later on.

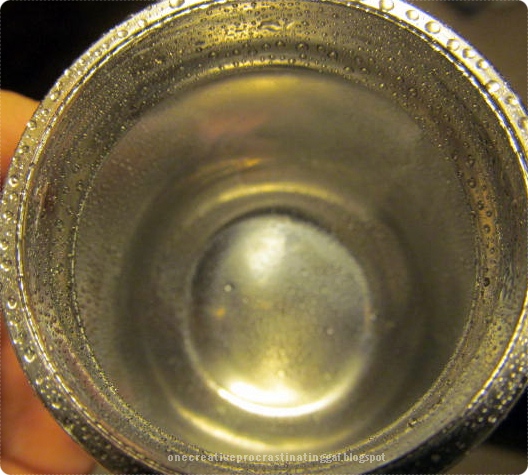
Put your glow sticks in your jars and fill it with water for that extra glow factor.
http://onecreativeprocrastinatinggal.blogspot.com/

http://onecreativeprocrastinatinggal.blogspot.com/

http://onecreativeprocrastinatinggal.blogspot.com/

My first holiday without my hubs and boy did I miss him.  Even though we were not together, he is always on my mind and in my heart.  So, I decided to create a sweet little nothing for him.  I used a expo marker and did my I <3 U message on there so it would be easy to read.  Then, I went back over the letters and heart with a circular motion to make it stand out more.  Bold it if you will.  Expo marker wipes right off and you can go on about your business. So sweet!  I snapped a picture on my phone and sent it to my hubs in NC.

http://onecreativeprocrastinatinggal.blogspot.com/

http://onecreativeprocrastinatinggal.blogspot.com/

 My sister Brandy and brother David decided that they were going to go swimming in the pool later and I thought it would be really cool to have the jars as underwater lanterns to add a cool factor.  I took them out because the kids were ready to play with them.
http://onecreativeprocrastinatinggal.blogspot.com/

Glow sticks provide endless hours of entertainment, especially for little kids.  These glow sticks originally came as a set of 3 bracelets with the little plastic connectors per pack.  I pulled them out of the jars and gave them to the kids.  We had 5 kids ages 4-7 to entertain with glow sticks.

What did they do with them?  

1. The boys played like they were Ninja Turtles and Power Rangers fighting with swords.
2. The girls pretended they were little angels and put them on top their heads.
3. The boys wore theirs as a glow necklace at first because they each had 2
4. The girls wore them as bracelets
5. They put them on the animals
6. My mom and I got decorated with necklaces and such for the kids amusement.
 {the kids did the decorating}
http://onecreativeprocrastinatinggal.blogspot.com/
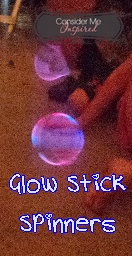
7. They were sitting and spinning them and I thought it was so neat how they looked, so I snapped a pic. 
8. We put the jars out in the yard in a circle to make a designated 1 person firework safety area. 
9. They can easily make bath time more fun too, just throw 'em in there. 
10. Glow sticks are easily turned into night lights for bed time. 

{Eventually they were all undone and turned into all of the above back and forth.}

So you have had entire day and night of fun with glow sticks.  
Want your glow sticks to last longer?  Put them in the freezer and it will last some the following night.  

Fabulous and Repurposed- Party Decorations!

I love decorating for little gatherings all the time.  Celebrating Americas Birthday is no different.  All that sparkling, red white and blue!  I was completely inspired for this month at Hobby Lobby.  We do not have a Hobby Lobby like this by us.  I think I like it as much as I like A.C. Moore.  I was really sad to see there was no A.C. Moore here, but was so happy my mom took me to experience the awesomeness at Hobby Lobby.  Okay, enough of my ramblings.

What did we come up with for our festivities?

Personalized and Crafty all the way!


Plastic ware set up:

Napkins- rolled and secured with a cupcake ring.

Coffee Filter- cut in 4's, red napkin square side up and blue napkin triangle side up.  Fold and Roll.


DIY Containers:  Scrapbooking paper wrapped around cleaned out spice containers and twine wrapped around 2 of the containers.

DIY Paper Pinwheels:  Depending on the side of the fan you would like fold your scrapbooking paper like you would fold a fan.  Once, you get to the end all you have to do is stretch to get your circle and glue the ends together with super thick tacky glue.  You push the center down and glue card stock on the back to hold in place and something like a bling on the front.   There is two ways to make fans.  I made the larger ones buy folding, tying and folding in half and then fanning out to glue.   I will do a more detailed post about this soon.   I used gold glitter for added sparkle and to jazz up the pinwheels a bit more.


Blinged out bottles:   Personalizing is such a great thing when you are going to a party or even a family gathering.  I know I am always losing my drink; my kids lose theirs and everyone else is asking..."Is this your drink?"   I wrote out the first initial of a guests name and applied the little bling beads for that personalized touch.  There were just a few kids, so that is why I only did a few bottles.  My son was the only boy and I made him a star on his.  Personalized water; you can do the first letter in bling and jot down the rest of the name.

Name/Food Tag holder:  Up to the left there is a little striped and starred jar holding the name tag/food tag stick.  All that jar is a empty dip jar with scrapbooking paper attached to it.  I did the star paper strip on top of the striped.  Really simple and super cost friendly.  I love repurposing.  You can do so many things with all of your old jars.  We do recycle, but some things are just cooler made over.   

*You can place your name tags or food tags on the outside of food or as a place marker if you have more guests.   


Personalized Gatorade Bottles:  Cut a strip of scrapbooking paper to fit around the bottle and attach with glue.  Tie metallic red tinsel around the bottle top or center and run your scissors blade down it to make it curl.  You can always put the persons name on it some where with a paint pen or permanent marker.   You can tie a label into the metallic tinsel or even place one of the toothpick labels behind the strip and write the name of the guest the drink belongs too.  


Personalized Name/Food Tags:  Rectangle shapes from scrapbooking paper and the white/cream strips for writing details is card stock.  Accessories include:  blings and squares from other scrapbooking paper.  Once assembled, I glued them to a popsicle stick. 

Toothpick Labels:  I cut 2 squares that was on side of each other on a really cute scrapbooking paper sheet and put hot glue on the center line and placed a toothpick in and pressed shut.  The ends was left open so I can attach a small piece of card stock sticking out for a label, cupcake topper, cake topper or other food labeling.  I cut a triangle off the end to make it look like a little ribbon. 


Scrapbooking paper was my best friend in almost every part of personalization.

Scrapbook paper sale: $.44 for small, .69 for standard 12x12 paper and .49 card stock....all 1/2 off!
Blings- different sized clear- normally $15.99- 50% off so 8 bucks.  What a steal right!
Aleene's- Super Thick Tacky was $3.77

You can get your plastic ware, colored napkins, straws, plates, table clothes and even the metallic tinsel at the Dollar Tree.


I hope you all had a wonderful and safe Fourth of July with your family! 


Repurposing Glass Jars


I love repurposing things rather than throwing them away.   I have found a new appreciation for glass jars.  My latest repurposing activity was a Vlasic Pickle Jar!  I am working on my 2nd jar currently and plan on turning it into a flour jar.  It was really easy to do.  I had 2 jars; 1 was a Mt. Olive jar and the other was a Vlasic.  I was not able to get the plastic label off the Mt. Olive jar.  My kids took it upon themselves to store their crayons and other drawing tools in it as storage.  Proud mama moment there.  However, the Vlasic pickle jar has paper which is so much easier to get off with a little soaking.   It has a really nice design as well.  It has the 20, 40, 60 ounce lines.

1. Clean your pickle jar and let it air dry....make sure the pickle smell is gone. 
2. Spray paint your lid and let dry - I used metallic gold.
3. Tape your rectangle off for your black paint center. 
4. Paint a few coats of paint and let dry.
5. Line with liquid lead paint in a dotting motion around your painted rectangle.

After everything is all nice and dry you can place your descriptive block stickers on your jar or use the small chalk to write it.  I had a pack of multicolored scrapbooking sticker blocks that came in a set, so I just used those.  I do realize there is 1 letter that is a different color than the rest.....that is all I had and plus I liked that it made it not so plain.  Pour in your sugar or other dry ingredient you wish to decoratively store!

IF YOU WANT TO USE CHALK:
Use your sponge brush and alternate with the design in between drying.
1- sponge pat paint horizontally
2-  sponge pat paint vertically 
Repeat and let dry and it even works on plastic.

*One more thing I have found is that black acrylic paint is the same exact ingredients as chalkboard paint. I have not found any issues with using black acrylic paint as chalkboard paint.  I came across this discovery when I painted our kitchen door with chalkboard paint and ran out before it was completed.  I got to looking at the backs of the bottles and finished the door up with black acrylic and it worked just fine.  

Chalkboard Door

What do you like to repurpose?

Art & Crafts with those Plastic Easter Eggs!


I do not know about you but in our house those lovely little plastic Easter Eggs are just one of those things you just keep finding throughout the months following the Easter holiday.  For some reason it seems like they are multiplying.  I found a way not only for us to have more fun with them, but I was able to dispose of the ones we used.  The kids can only re-hide the eggs over and over so many times before they are just over it.

http://onecreativeprocrastinatinggal.blogspot.com/

Make a Shelf Light Out of a VOX Liquor Bottle


I am in love with this bottle!  Circles and lined glass, I knew it would be perfect for this red light.  I always have to get my husband to drill the holes, because he has the man power to drill through the glass. I am the water sprayer.  : )  We did it together.  Wash your bottle out first and let it dry.  Use some teamwork to drill through the bottle.  In order to prevent the glass from becoming to stressed and cracking you need to spray water every so often to wash away the glass dust and cool down the bit.  

Normally we use a smaller diamond bit and end up having to double drill.  This time we went to Lowe's and picked up a large diamond bit for $24 and it did the trick the first time.  I strung a 35 count red holiday light set through the hole and my husband pulled the lights up with a stretched out close hanger.  The kids kind of took it over though....night light. 


DIY~ Invisible Bookshelf

I was browsing through the new Pottery Barn catalogs scanning for project ideas, I saw some covered books and I loved them.   I plan on doing more in the future and that will be a future post.  It was super easy and I love the look.  I decided that I was going to try out the covered book and then turn it into an invisible bookshelf. : )


Faux Mercury Glass Candle Holder Tutorial

Okay guys, I wanted to show ya'll how I did the Faux Mercury on some glass jars when I was working with the glass bells.  The bell didn't turn out exactly how I wanted it to but it gave me a chance to turn it into my own.  A more open candle hold turned out beautifully. 

http://onecreativeprocrastinatinggal.blogspot.com/


Clean out what you are wanting to spray.  I practiced on a empty baby food jar and a empty fruit jar. 

 -I grabbed a candle holder from the $1 tree for my keeper.
-A can of Looking Glass Mirror spray
- 1 oz spray bottle with 50/50 vinegar-water mix
-paper towel, soft cloth or q-tip

Everything I have read says spray it....but be careful because it is super thin and it runs.  No room for error.  I don't see how every person I have ever seen that has recreated this look is perfectly clean.   I suppose maybe it is a skill/experience thing, but before I was done my hand looked like I was turning into the tin man.  Learning experience for sure.  With the bigger holder, spraying further away produced the best effect. 

Here is the process:

This is after 2 layers of spray.  See my silver hand?  You should have seen it by the end of all the spraying.
http://onecreativeprocrastinatinggal.blogspot.com/

 This is what it looks like as it is drying. As soon as it dries spray again.  Spray about 8-10 times.
http://onecreativeprocrastinatinggal.blogspot.com/

 Completed spray.  The mirrored look is really pretty too.  As soon as it dries spray with your 50/50 solution.
http://onecreativeprocrastinatinggal.blogspot.com/

50/50 water-vinegar spray & a dampened cloth/paper towel with the solution.  Let it sit for as long as you let it dry and softly rub your dipped paper towel across the surface in order to get your effect. Let it sit for a min or two then start.   If it is not the effect you are wanting then do another spray and do it again.  Bigger beads=bigger effect.

 I was happy with this effect with the bigger bubbles.
http://onecreativeprocrastinatinggal.blogspot.com/

Give 1 to 2 more sprays to give a nice effect so it is not open spots.
http://onecreativeprocrastinatinggal.blogspot.com/

I am sure you noticed that there are 3 different jars.  I guess I had inhaled too much paint fumes and it seriously made me really loopy and I got a super bad headache. I sprayed outside and went back in after it dried but the smell is super strong so if you try it stay outside. It was super cold and I was being my normal self...a procrastinator.   I AM working on that and am seeing some progress.  I wanted the bells finished before my daughter returned to school for teacher/principal gifts which was the next day; then Christmas break. However, I do plan on doing this again in the future when it gets warmer out.  I love the look of it.  I have a feeling that it can only get better from here...right.

Repurpose Old Books into Christmas Ornaments


Find a book that has pretty good sized pages.  Medium to large books are better.  Fold the page in half toward the center to see the size of the loop.  Cut the same length as a medium sized ribbon.  Run an X-acto tool along side the size you need to make a nice cut. 

http://onecreativeprocrastinatinggal.blogspot

12- 5/8" page sections
5/8" wide ribbon: cut into the length of the page
Choose your colors and decide how many pages you want looped or open
Jute cord
Tape
Hot glue
Accessories you want like tied ribbon, bell, cut outs etc.
I taped the end of the ribbon with the page: see photo 1
Start with one piece of looped ribbon & put a dot of hot glue on the bottom
& attach the next loop until all the loops are hot glued together:see photo 4
Pull about 8" of Jute & tie a knot around the end & place in the center of the ornament: see photo 4
Cut 2 pieces of ribbon and X them {shorter than sides} :see photo 5
Attach your ribbon and bell to the front of the ornament.
*If your ornament is wanting to go forward put the bottom of the jute on either side of one loop with a small amount of hot glue.


Happy Holidays.

Baking Pine Cones


When we picked up our pine cones a few weekends back they were covered in sap....they were really sticky.  I looked up online for options to take the sap off and they mostly involved vinegar.  Although vinegar is really helpful in so many ways, I was trying to avoid using it.  I can't stand the smell of it and plus the drying time was too long. 
When we had picked up the pine cones, sap got all over my fingers.  The only thing I had on me was some Bath and Body Works hand sanitizer, which got all of it off.  
This got me thinking that if the hand sanitizer worked maybe I could scrub the pine cones with rubbing alcohol and it would take it off of them.  I poured some rubbing alcohol in a container and added a little water and threw a pine cone in.  I let it soak for around 20 minutes and tried scrubbing the sap off by scrubbing it off with a old tooth brush.  It got some of it off but not all of it.  Then I gave it about a day to dry out. 

I figured why not bake it in the oven to see if the rest would melt off and so the pine cones would open up.  This is what they looked like after the alcohol scrub and before the oven.

http://onecreativeprocrastinatinggal.blogspot.com/

Although there was a bunch of pine cones, I wasn't sure if it would work or not so I only used 2 for a tester.  I put them on some foil and in the oven at 350 and cooked them for about an hour.  They opened after about 30 minutes.  I turned them to have to sap melt off the opposite side.  The house smelled of pine and it was such a lovely smell.  You could never get that smell in anything else you could buy with a pine scent. So if you want your house to smell of pine, throw a few in the oven & bake them.

http://onecreativeprocrastinatinggal.blogspot.com/

They opened up, the sap melted off and the left over sap became shiny and non sticky.
So that is how I baked the sap off my pine cones and got my house smelling of pine.

Make a Daily Gratitude Bottle


In order to make a point to be grateful for each & every day, I created something to help.

Attitude of Gratitude bottle

http://onecreativeprocrastinatinggal.blogspot.com/
http://onecreativeprocrastinatinggal.blogspot.com/http://onecreativeprocrastinatinggal.blogspot.com/
Print out your favorite font and cut around the words. 

Tape it to the bottle.

Trace over each letter over and over with a permanent maker until it has got a dark enough letter to see.  

Lift up the paper to trace each letter with the permanent marker on the bottle.

After all of the letters are all traced then you can go over it with some puff paint.

Let dry and it is done. 

*If you made any error or smears then you can use a x-acto tool to remove the extras.

_______________________________________________________________________________________

We started our Attitude of Gratitude bottle today. 

This morning before my daughter went to school, we each said something we were grateful for and we wrote it on a small piece of paper.  We then dropped it into the bottle. 

Each day we will do this and when it gets all full we can either empty it or start a new one.


Join the Social Linky Party right here.


DIY "Pick A Prayer" Magnets

Prayer is pretty important in our home.  We have been praying for every meal for a few years now.  Why not for longer?  Well, I was really unsure HOW to pray.  I was unsure of the words and I asked God to bless me with the right words.  It never flowed and always seemed forced and I wanted my words to flow.  It never "Sounded" like a prayer and after letting God know I was in need of the love for him in my heart coming to light in words, my prayers were answered after a while.  I am still working on other prayers and how to say them, but it has gotten easier with time.  It took trial and error with myself and my kids on feeling the prayers words in the beginning, but we learned together.  My husband can pray and it has always flowed.  My daughter still struggles a little with the prayer we have came to say at every meal for grace, but my son does an awesome job.  I think it was a bit too much for her to remember to say because she always ends up rambling.  Trying an alternate was due.

The prayer we have come to say:

"Thank you lord for the blessings you give us each and every day.  Watch over all of those in need.  Watch over daddy while he is at work and keep him safe.  Please guide us on the right path. Bless this food we are about to receive, Lord your name Amen."

Now we add to it if Kaylei is at school or other things that may be going on.  My son likes to add please don't let anyone get eaten by dinosaurs sometimes too.

A fellow mom on Pinterest had pinned a photo of a "Prayer Pail" and I immediately repinned.  I always like to make everything my own and make it a fit for us.  A "Prayer Pail" is a fantastic idea, but another thing on the table just was something I wanted to avoid.  Where else to put prayers but on the fridge and on magnets for ease and they are where the food comes from most of the time so it is a great reminder. 

http://onecreativeprocrastinatinggal.blogspot.com/

http://onecreativeprocrastinatinggal.blogspot.com/

 So I tell you: Ask, and it will be given to you; seek, and you will find; knock, and the door will be opened for you. For everyone who asks receives, and the one who seeks finds, and to the one who knocks, the door will be opened. -Luke 11:9-10
Inspired by Prayer Pail. She had some wonderful prayers that her family chose to use and there is a pdf available.
For our "Pick a Prayer" project I copy and pasted the 25 prayers that was listed on her site.  I wanted to do something a little more a fit to us, so I added a few more prayers for a total of 31 prayers and I altered those prayers a bit to fit our blessing time style.  This was in order to have a new prayer a day or more options for the kids to choose their favorite prayers from. 

You need:

Construction Paper
Print the prayers or copy and edit
Create a title in your choice of font and print
Cut and glue your prayers to a Jumbo popsicle stick and stick a flat magnet with a sticky back on the backside. (I cut each magnet into 3's)

Optional- Print on cardstock, scrapbooking paper or other decorative paper of your choice.


*In the morning the kids can choose 3 that they want for the day and put them in the 3 spots for main meals.
Our goal in our home for teaching our children to pray:
*Not to make it seem just like words coming out of their mouths but for them to understand why we pray and for it to mean something to them. 
*For them to understand there is a higher power and that nothing is given to us, but that we are blessed to have or get whatever we do. 

Now this is just how we do it in our home, but everyone has their own ways to do things that work for their home.  We have went to SO many churches in this area and we have not found a place that fits our family, but that does not mean that we don't believe and teach our children about God.  We once had a church that we loved and we even were baptized there, but we moved.  We do not feel that you have to go to church to believe in God.  This is just our opinion.   I would love to hear how others pray or teach their children to pray.


31 Prayers
Social Linky Party right here.


Repurposed Wine Jug Light

I love the glow of holiday lights and the way the warm and brighten the room at the same time. I have to admit, I am kind of obsessed with creating thing with glass bottles. I want to repurpose them into something great. I have wanted to try the bottle lights for a long time now, ever since visiting a local International festival booth that had a few decorated glass bottles. I took a while for me to figure out what I needed exactly, but my husband was determined to get me what I needed. He actually found the perfect sized drill bit and was the muscles behind this project. This particular repurposed bottle was my very first project with drilling holes through glass. 

http://www.onecreativeprocrastinatinggal.blogspot.com

Materials:
1 Large Glass Wine Jug
Strand of around 30 lights
Plaid remarkable repositional plastic Reading related clings
Glow in the Dark Paint
Matte Medium
7/16- inch drill bit

My husband actually found 6 big glass wine jugs set out for the recycling truck outside someones home and bought them home to me. (love that man)
* So I began by washing it out and letting it dry. 
*The glass was thick so my husband helped me drilled the hole to feed the lights through.
*Then I did a few coats of Matte Medium on the frosty looking spots on the bottle. 
*I put glow in the dark paint under each repositional cling and let them dry. 
*I could only find the burnt color lights so I went with that color. 

It took a day or 2 for the whole process. 

I have quite a bit of glass bottles that I plan on doing projects with so stay tuned for those projects in the future.  I hope you enjoyed this craft.

Happy Crafting.


Recycled cans and plastic bottle turned into a Wind Spinner


You can make such neat projects with recycled materials! 


Making the lantern

You need:

Clean Soda Can
Wire – 30cm
Cutter and small pliers
Screwdriver
Piercing tool
Black marker
Dish cloth
Basin
Tealights

1. Pull the tab to open the can, taking care to leave the tab intact if possible.  Rinse out your can and fill it with water.  Freeze 6-8 hours.

2. Lay the frozen can on a piece of folded dish cloth and keep wiping it as you work on it.

*If the tab was detached when you opened the can, pierce two holes on opposite side of the top of the can.

3. Use the black marker to draw 12 equally spaced dots around the can, 2cm(.79") from the top edge. Draw another set of 12 dots corresponding to the top dots on the lower part of the can, also 2cm(.79") from the bottom.


4. Lightly mark a cutting line to join a top dot to the bottom dot which is on the right of the one directly beneath it.  Draw it in a slight S-curve.  Join all the top dots to the bottom ones in the same way. Follow the lines to cut through the can with the cutter. Take care to hold the can firmly with your left hand.


5. Set the can in your dish rack or empty sink and let the ice melt. Wipe it dry. I ran hot water over mine to speed up the process.

6. Lightly press the top of the can downwards to open the cuts. As you do that, slip the screwdriver inside a slit to press onto the bottom of a strip of the can to shape it outwards. Repeat for all the strips to shape the can into a lantern.


7. Turn the can upside down and press onto the strips in the same way, to obtain an equally-balanced lantern shape.


8. Place the lantern in both hands and twist it slightly, pressing inwards a little.


9. Pass the wire through the set of holes at the top of the lantern. Bring the ends together to form a loop before twisting into a hook for hanging. If the tab is intact, use it to hang the lantern.


Making the tea light holder

Follow all the steps for making the lantern but do not pierce the set of holes at the tops. (Note: The body of the orange can is cut in straight lines unlike the lanterns which has lines cut in S-curves.)

Cut out two strips from the can to make a wide opening. Use the pliers to bend the cut sharp edges of the top and bottom of the opening inwards.

As the top of the can is flat compared to the bottom, use it as the base instead. So turn the can upside down to place the tea light inside it.

* Remember, never leave the light unattended.
If you mess up, you can always turn it into something else.  
I DID!


   I turned my failed Soda Can Lantern Project into this Recycled Wind Spinner!

www.onecreativeprocrastinatinggal.blogspot.com

 So now you know how to make the middle of the wind spinner. So lets move on to the top and bottom.

www.onecreativeprocrastinatinggal.blogspot.com
I cut the top of a water bottle off and the bottom.

I took lightly went around the edges (not on them) with a lighter.  For the top I cut horizontally and VERY lightly went around with a lighter.  Poke a hole on each side of the top of the bottle to push green crafting wire through.

I spray painted the can with gold spray paint. Let Dry
Traced designs from a stencil I had laying around from walmart with a black permanent marker.

The bottom was painted with only red nail polish.  The top was sprayed with gold spray paint, then painted with red polish and finished off with a few stripes with the permanent marker.  I used what I had laying around and I didn't have any red paint but the red nail polish worked just fine. 

After everything was dried I assembled with hot glue. To hang I strung string through the crafting wire and hung up.


Repurposed Outdoor Creations


DIY Garden Path


Take a multi picture frame and fill with concrete. (Tip from a reader: Beeswax on the wood - or cooking oil will aid in the release).    Credit to: Home Steading

This is such a GREAT idea! Who woulda thought, I surely didn't. I would love to do this. I can never find pictures small enough to fit in the smallest pictures sections in the frame anyway.

Toilet Paper Seedling Starter

This is really useful to me instead of using the Natural Seed Starter Pots.  You have to buy toilet paper anyway..Right! ; )

What kind of things have your repurposed or ran across and put on your to make list?


Copyright © Consider Me Inspired | Custom Blog Design by Lilipop Designs