


*Download the social media icon set you want or right click and save individual ones.
*If there is a .zip file, right click on it to "unzip" it and open the folder and save it where you can easily access it.
*After you decide which icons you want to use, upload them to a site like Photo bucket to get the HTML code.
To make things easier on yourself open up 2 internet windows.
Window 1: Blogger Draft Post mode.
Window 2: The Layout editor in Blogger for the other page.
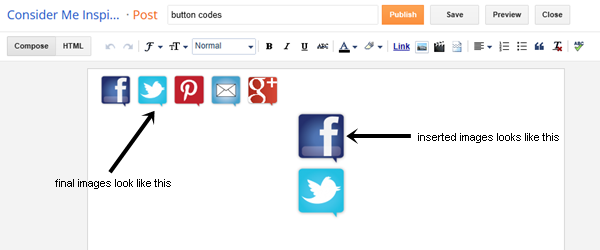
Your draft post in Blogger will be where you'll insert your icon images and then link them to the web page you want it to go to. It is just like putting a website link into a word and it will go to that website if you click on it, but instead it is a picture. (see below)
So now on to the trickier part:
Click on the HTML button, which is located right beside the Compose button.
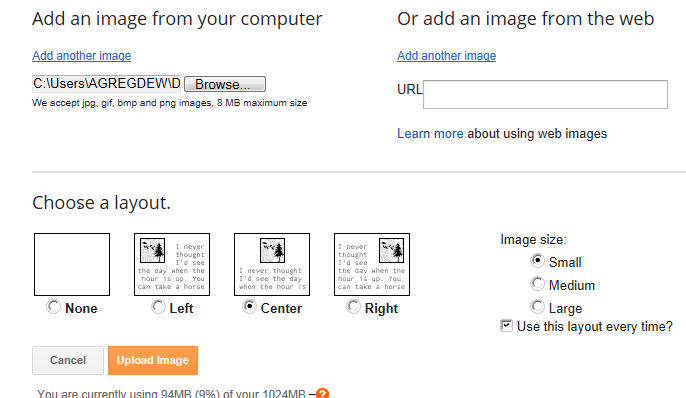
1. Insert your first icon image in the HTML format.
Repeat the steps until you have all of your desired buttons.
Highlight the image and add a link. (You might need to click the Link button twice to trigger the add link pop-up box.)

You need to get your code to look like this (click to enlarge):
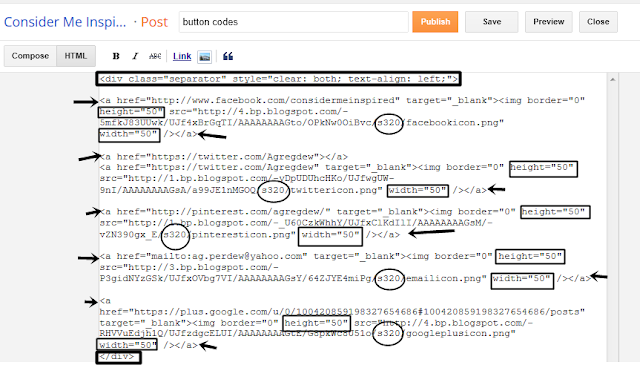
What does this all mean?
<div class="separator" style="clear: both; text-align: left;"> if your margin is on the right side.
<div class="separator" style="clear: both; text-align: right;"> if your margin is on the left side.
<div class="separator" style="clear: both; text-align: center;"> if you want your button centered.
You will delete all other codes above each HTML like that and all <div> </div>.
Only one closed </div> at the very bottom to tie it all together.
Arrows- <a href=" should be the start of each image and </a> at the end of the image to close it.
Somewhat Circles- I had one that said s200 and I just changed them all to s320 and all was fine.
Thin rectangles- you can look at the original codes in the above message and the height and width was 80, which was too big.
*Note- you can change image sizes this way as long as it is not a direct photo bucket link image. I was able to change this image due to it being upload in the HTML format.
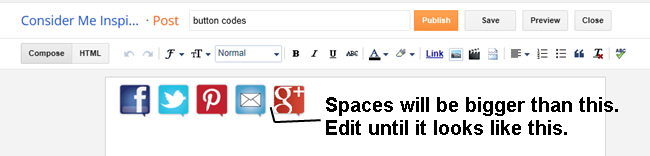
Your icons should be flush horizontally, like this. I found all kinds of options to make the icons go to the desired url, but they just confused me. I figured out my own way that was much easier. While you are still in the Compose tab, right click each image and click the Link option. Gather all of your web page url information.

Paste it right there in the "To what URL should this link go" box. Repeat until of your image have the corresponding url link.
TIP: The easiest way to add a link to your email icon is to use the this code: mailto:youremailaddress@youremailaddress.com in the LINK field.
 |
| CREATE LINK ICON |
Click on the email icon image, then click the CREATE LINK icon, and type in the above
"USE THIS CODE" text. Don't forget to put the email address you want to be contacted at in there.
Switch back to the HTML editor and copy the entire code. They will look like the image above that I drew all over.
Now finally you get to go to your LAYOUT window. Click on your add a gadget and pull up the html option box and paste the code. Preview your work and make sure everything looks like it should before you save.
If you ever want to center the items in your HTML gadget, enter the code <center> at the very beginning of everything in that gadget. And then </center> at the very end.
Very big thanks to a certain blog for helping me understand a little better and figure out a few more easier options on my own.
I hope this helped you get your social media buttons added and working on your blog.