Printfriendly

Popular Posts

Showing posts with label House For Kids. Show all posts

{Guardian} Angel in a Jar Activity


Look what we caught! A Guardian Angel!
Isn't this just so cute! One of my sisters made this. The little thing in the middle is one of those bobble head photo pieces you can pick up for a buck. Glue it to the center of the bottom with hot glue. You could even put a photo of a passed loved one inside or draw your own face as your guardian angel.  All of the paint is on the outside and is acrylic.  Easter grass...you know the pretty metallic or the ones that change colors are a great option to surround your guardian angel.

Print this on a little note and attach it to the jar with a tag: 

My Guardian Angel
Dear Angel ever at my side,
how lovely you must be---
To leave your home in heaven,
to guard a child like me.
When I'm far away from home,
or maybe hard at play--
I know you will protect me,
from harm along the way.
Your beautiful and shining face,
I see not, though you're near.
The sweetness of your lovely voice,
I cannot really hear.
When I pray, you're praying too,
Your prayer is just for me.
But, when I sleep you never do,
You're watching over me.

--  psalm 91:11-12 

Really neat little project. Make sure that you put a little piece of lace or tulle over the top to make sure your guardian angel does not fly away. :)


Riddle Game for Kids- "What am I"


Are you ready for an inexpensive and fun game? I remember playing "What am I" when I was younger and always had lots of fun. It was all verbal games though, not any neat pictures or anything. I decided to put together some "What am I" graphics together for us to play at home or even in the car on the go. You can never go wrong with games that teach and are a blast to play.  I really enjoy having younger children that are still into the "FUN" learning. Notice those quotes? That isn't wrong, right? Nah, I didn't think it was so horrible either. I will continue to go the route of winning my kids over with the "FUN" aspect of the games. Exercising their little brains and making some new brain cells. My husband brings the imagination to the table and I tell you it is endless hours of crazy sounding animals running amuck pretending. 

Here are our animals:
Lion
Elephant
Monkey
Turtle
Flamingo
Bird
Cat
Zebra
Beaver
Bear
Giraffe
Cheetah
Snake
Polar Bear
Dolphin

Right click and save to your computer then print. I am still trying to find the best way to do a free printable, so if you have any advice, I am all ears. 

Print this page, then cut out your images.  
Fold your index card in half and glue the "What am I?" on the front.


Have some fun with the inside. Let your child draw the animal on the back once they figure out the animal. *More than one kid? Simple....let them take turns.  They will enjoy drawing their animals as well as making the sounds or actions that the animal does.You can always go outside the cards. I offered up a few more riddles so they could make a few more sounds. Rooster, Pig, Horse, Cow and a Dog. 


Want to make your own?

*Think of new animals and 3 things about that animal and type it up for your image.
*Create your image frame that will fit your project and choose your text.
*Change your frame colors to reflect the animal or the animals environment you are talking about.

You can do animals, objects, people etc.

Super easy right. I hope you enjoyed this and will have fun playing this game with your littles. Please do let me know if you try this out, I would love to check it out.


Alphabet Recognition- Practice Writing and Reviewing

How do you stay up to date with your children during school breaks? School is fixing to start back for not only my daughter, but my son will be attending Kindergarten this year. I have been reviewing ABC's with my son to make it easier for him when he does start going over this information in the beginning of school. We came up with a little ABC flash card stick activity to help out with letter recognition. Going over each stick with him is starting to his letter recognition. 

Popsicle Stick Activity

Grab your favorite learning booklet and pull your Alphabet page out.

I had the 1 sided self-seal laminating sheets so I just put one on top and then put one on the back.  You can use the double sided laminating sheets if you like.  I happened to have this on hand already, so I did not bother.

*Cut your letters.

We practiced writing each letter with the cards to get more familiar with each one. My kids love anytime they get to pull out the markers and do some drawing it is a fun time to them. I want them to be excited to learn in a fun environment so they do not get bored.

What about the little letters??

Problem solved. Hot glue your flash card to a giant popsicle stick and write a little a on the bottom.  So, now you have the big letters and little letters covered. Have fun with your littles making new learning memories. My son loves to get all of his letter sticks 


How do you review?

Chica from Sprout is in the House!

 Chica is always involved in some kind of adventure and learning something new.  Who is Chica?  She is only the brightest and cheeriest little chicken on Sprout!  The way she explores new feelings and things is really helping my preschooler.  Something I like as a parent is that every episode has something to teach and it all comes out perfectly on a preschooler level.   My kids are so happy to be Sproutlets. Even my oldest loves dressing up and the new season of Chica just gave them an excuse to dress up when their imagination calls.  In my kids eyes dressing up is the ultimate adventure and is so cool in their words.  Dressing up just gets their imagination flying.  They jumped up and down with joy when they found out that they were going to get to dress up with The Chica Show.  

I asked my kids why they liked The Chica Show and they said they like that it has imagination.  Also, they said that it is really neat when you can just be whoever you want to be.  It is bright, cheery and is full of fun learning.  We will be celebrating the upcoming season of The Chica Show on Monday, July 29 by dressing up and tuning in at 11:30 a.m.  The costumes are all ready and my kids have literally wanted to wear them everyday.  They finally got them and have been running around in their costumes ever since.  We got to creating and have not only managed to bring laughter and smiles in my home, but also to the people in the passing cars that caught a glimpse and just smiled.   

              Aarrrrgh!      Pirate Kaylei                               Up, Up and Away!  Super Hero Gerry
http://onecreativeprocrastinatinggal.blogspot.com/http://onecreativeprocrastinatinggal.blogspot.com/
*Materials to make both creations were provided to explore dressing up with the brand new season of The Chica Show.  

Head on over to Sprout online for the instructions to not only these costume creations, but a few more.  They have crafts, coloring pages and even recipes for you to explore. The instructions are easy and the items don't cost much.  You probably already have enough items at home to make one or more of the costumes for a great day of dress up.  The clothes are part of the adventure and makes imagining that much more enjoyable!  I hope we inspired you to get your Sproutlet ready to dress up.  I would love to see your costumes and creations.  Don't forget to watch the brand new episode of The Chica Show and see what is happening in the Costume Coop!  Have a great weekend. 


So Many Fun Uses for Glow Sticks

I snagged glow sticks last year for .25 a pack after Fourth of July at one of the sales.  I love a great deal and am almost always suckered into the little after holiday sales.  I try to wait until the 90% off but often hit it at the 75% off too because most of the time there is hardly anything left by time 90% comes.  After I bought them, they were put in a box and pulled back out this year unbroken.  The little tubes they come in are pretty sturdy. 

What did we do for fun with the kids on the Fourth?  We went to a firework show and dinner the night before at my moms church; the kids shot a few fireworks with my sister and brother; we went for a walk with the kids after we shot fireworks; cooked out and enjoyed family time.  By the way, I have 3 sisters and 1 brother.  My sister Brandy is 2 years under me and my brother David is 2 years under her; then we have a 18 year old sister and a 7 year old sister. 

Glow jars are just so neat.  Glow stick are bendable and easy to shove into different containers.  LIKE-  empty baby food jars and lids to other jars.  Repurposing at its finest. :) The lids below came from the square glass jars with the hollow glass bubble lids. They had the plastic seal, but they were aged and came undone easily.  My first idea was to cut open large glow sticks and pour it into jars, but then I found that it was bracelets instead of a large glow stick in each package.  I plan on trying the larger ones later on.

Put your glow sticks in your jars and fill it with water for that extra glow factor.
http://onecreativeprocrastinatinggal.blogspot.com/

http://onecreativeprocrastinatinggal.blogspot.com/

http://onecreativeprocrastinatinggal.blogspot.com/

My first holiday without my hubs and boy did I miss him.  Even though we were not together, he is always on my mind and in my heart.  So, I decided to create a sweet little nothing for him.  I used a expo marker and did my I <3 U message on there so it would be easy to read.  Then, I went back over the letters and heart with a circular motion to make it stand out more.  Bold it if you will.  Expo marker wipes right off and you can go on about your business. So sweet!  I snapped a picture on my phone and sent it to my hubs in NC.

http://onecreativeprocrastinatinggal.blogspot.com/

http://onecreativeprocrastinatinggal.blogspot.com/

 My sister Brandy and brother David decided that they were going to go swimming in the pool later and I thought it would be really cool to have the jars as underwater lanterns to add a cool factor.  I took them out because the kids were ready to play with them.
http://onecreativeprocrastinatinggal.blogspot.com/

Glow sticks provide endless hours of entertainment, especially for little kids.  These glow sticks originally came as a set of 3 bracelets with the little plastic connectors per pack.  I pulled them out of the jars and gave them to the kids.  We had 5 kids ages 4-7 to entertain with glow sticks.

What did they do with them?  

1. The boys played like they were Ninja Turtles and Power Rangers fighting with swords.
2. The girls pretended they were little angels and put them on top their heads.
3. The boys wore theirs as a glow necklace at first because they each had 2
4. The girls wore them as bracelets
5. They put them on the animals
6. My mom and I got decorated with necklaces and such for the kids amusement.
 {the kids did the decorating}
http://onecreativeprocrastinatinggal.blogspot.com/
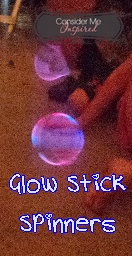
7. They were sitting and spinning them and I thought it was so neat how they looked, so I snapped a pic. 
8. We put the jars out in the yard in a circle to make a designated 1 person firework safety area. 
9. They can easily make bath time more fun too, just throw 'em in there. 
10. Glow sticks are easily turned into night lights for bed time. 

{Eventually they were all undone and turned into all of the above back and forth.}

So you have had entire day and night of fun with glow sticks.  
Want your glow sticks to last longer?  Put them in the freezer and it will last some the following night.  

A Mother's Love- Art Activity


A Mother's Love Project how to:

Trace your little ones left hand and your right hand on a solid colored paper and cut out.
Paste to your favorite designed scrapbooking paper.  You can frame it, laminate it or just hang it as is on your wall or fridge.   Cute right!  My mom actually did this with my youngest sister and I just had to share it with ya'll. 

Make Your Own Ribbon Pony Tails!

Little girls are so lucky, they get to wear all kinds of pretty little pony tails and bows.  Normal bows do cost a bit and it is either you love it or not so much.  Make your own hair bows and save money and customize it to your outfit or liking.  Ribbon is pretty easy on the wallet and has endless possibilities.  Check out these cute hair bows the girls are sporting. 


Pretty simple right. You could do even more than just 2 different types of ribbons to make it more colorful or more full.  We haven't had any issues with the ribbons falling out or coming undone, so tie 'em tight.   I hope you have fun making some new ribbon hair pony's!   Stay cool and I hope you are enjoying your Summer.   I am currently on the Mississippi Coast spending some much needed family time with my mom, sisters, brother and everyone else.  I pop in here and there, so if you are wanting to chat or sign up for something just shoot me an email.  Away from the blog for the moment. 

DIY Coloring Book

http://onecreativeprocrastinatinggal.blogspot.com/

My kids LOVE when I print them coloring pages or other activity sheets.   I decided it would possibly be easier to print them pages here and there rather than buying specific coloring books.  It seems to be that most of the coloring books have so many activities in them.   Don't get me wrong activities are all fine and dandy, but not the same as a coloring book.   I remember when I was younger, there were hardly if any activity pages in our coloring books.  Now, I do pick them up coloring books every once in a while for a prize for behaving in the store or something.  I try not to buy to many, because majority of the time I end up picking them up off the floor just barely surviving with all the pages crazy and bent.  Coloring pages are always all over the place.....never left in the book.  Having the kids art work  all over the house never gets old.   While we are talking about coloring, I have to say that it really makes me so excited to see how well my son colors.  He has been coloring like the above photo since he was 3.  He is very particular and takes his time when coloring so it turns out as neat as possible; in the lines(for the most part) and no white spots.   I hope he will still color as well when he gets in school.  It worries me because there is a time constraint on the activities at school and I don't want him getting all upset because he couldn't finish his work the way he wanted.  We will cross that little adventure when we get to it. 

My son learned his ABC's, however we are working on the letter recognition side of it.  I grabbed images from Bing and Google with the words "FREE ABC COLORING PAGES" and VOILA, lots of coloring pages.  One day I figure out how everyone creates such awesome images and I will be able to do it myself.  I really want to be able to provide a print here option rather than going to an outside imaging source to prevent one from hopping all over and downloading images.  For now it is easier to go to the net.  I wanted to include the big letter and the small letter, as well as only "A" related pictures.   We started out with only the letter A book, because I did not want to overwhelm him with all of the letters.  Not to mention, he would want to color the whole book.  It is a work in progress, because he just wants to color....BUT he is learning his letter recognition through coloring and other activities we have created.   I will jump at any chance to provide some creativity within my kids.  This was just one more way to include fun and learning in one.


I hope you enjoyed this activity, and I hope it can be put to good use in your home!


*Images were all free via internet searching.  If you see an image on Consider Me Inspired, it was free some where on the internet.  I will always let you know if they were my own. 

3D Aquarium Learning

http://onecreativeprocrastiantinggal.blogspot.com/

We decided to make a 3d aquarium to brighten up our fridge.  We learned a little more about sea life while we searched for photos of fish and other sea creatures to make our aquarium.  He recognized fish and sea life from Spongebob and Finding Nemo while looking through pictures.  My son loved looking for fish for his aquarium.  We also went over which colors mixed together make other colors.  The marker colored fish was our examples.  

Blue+Yellow= Green
Red+Blue= Purple
Red+Yellow= Orange

What you need:
2 shades of blue tissue paper
Green streamer paper
Elmers glue with a little water mixed in
Paint brush 
Poster Board- Cut to size to FIT TO contact paper height
Contact Paper

Print outs or cut outs of your sea life you want to add to your 3d aquarium.

Fold your tissue paper and cut from the short end across.  I used 2 sheets total.

http://onecreativeprocrastinatinggal.blogspot.com/
Apply glue to a poster board with a paint brush attach your strips.  Continue to apply glue until all the white spots are covered with tissue paper.  Let dry completely then you can put your picture together.  

http://onecreativeprocrastinatinggal.blogspot.com/
Add your strips of green streamer paper along the bottom for border and if you want to add some sea weed type grass you can add that as well for extra sea fun.  Cut your contact paper wider than your picture so it will have a nice area to stick to the fridge.  I cleaned the fridge off just to make sure it would adhere better.  For extra support I placed our prayer magnets around it to make sure it stayed up and as time went on it is still attached to the fridge 2 months later.   

The more gentle you are with the tisse paper, the more effect the fish will seem to have.  Fun to touch and you could possibly use it as a table mat for a meal time.  The contact paper will stick and not harm anything.....in my experience.  Have fun.

Things you can look for today:

Like Me on Facebook will go live tonight at 7pm!  Come back and link up with over 100 of the best bloggers linking up.

Like Me on Facebook and Follow Me on Twitter AND Pinterest! 


Yesterday was my sons 5th birthday and my goodness how time has flown by.  You know I had to pull out the baby photos....I try not to do that much, because it gives me baby fever.  I will be sharing with you this week all about our Teenage Mutant Ninja Turtles Birthday Bash!  


Make Your Own Moon Sand!

Buy MOON SAND or make MOON SAND??  That is the question.  Well, not really because we actually made some.  


Regular recipes around internet use cooking oil, olive oil or baby oil.  We went with coconut oil. :)  Always being different.  I always say you never know unless you try.  I am glad to let you know that it worked just fine.  Coconut oil is good for you skin and is not oil or greasy feeling AT ALL.  It was solid so I microwaved it 30 seconds break 30 seconds and mixed until it was all liquid.  We made 2 batches...one for each kid so there was no fussing about he has more, she has more or not sharing.  

8 cups flour split 1/2 and 1/2 in your tubs.

1 cup melted coconut oil 1/2 and 1/2 in your tubs.
Blend, blend and blend.  You will know when it is done by the consistency. Instead of it falling apart when you pick it up it will be more manageable and moldable. 


Want glittered moon sand?

Add a palm full- as in cup your hand and fill it will fine glitter, dump and blend.


***NOTE- Mixing  food coloring does not work AT ALL.  I tried putting drops in the sand and I even tried blending food coloring in baby oil separately and neither worked.  I may have done it wrong, but no colored sand for us.  That is mainly why we went with glitter. 


They were so messy and basically looked like they had just been playing at the beach because both of them was covered from head to toe in moon sand.   I am not really sure how they did it because you see the size of the little plastic bins I gave them.  I know at one time they were pretending that they were stuck in the sand and couldn't move, but other than that...your guess is as good as mine.  I had them do the shake shake routine and then I resorted to some towel swatting before I let them back through the kitchen door.   

Let me know if you make any or have made any.  How did it go?  Any tips?

Make a "Find It" Bottle


What I used:
I heated water in the tea pot and whisked it in with the glitter glue.  It was a process on finding out what worked best.  I ended up pouring out and adding a few times.   The only other thing that I used was the tacky glue.  It created that pretty swirl look.  The pink/purple/blue turned out more swirled than the green/green/blue one.  They were both pretty.  Pour your mixture into the bottle with a funnel and shake until it looks how you want it then add the rest of the water.

The first picture is what it looked like after doing 1/2 tube of each one of the above stated color. The little 1 oz glitter in the above picture is what turned the water pink.   Don't forget to add a nice squeeze of the tacky glue.  I am really an eyeball it type person...so just go with what you think works and if it doesn't then play with the mixture.    We bought some WAT-AAH bottle from the grocery store for $1 and I loved the picture of the little screaming kid.   Once they see the little kid after the glitter starts to settle it makes them giggle. 

This was the time table for the bottle.  Since I have a almost 5 year old and a almost 8 year old  we decided to add objects in the bottles.  I did not originally want a time out bottle but wanted to make it because they were pretty.  Everyone has different choices on parenting and disciplining and we go with whatever the situation deserves for.  

Find it bottle for Kaylei with buttons, charms, little toys, hearts, beads and other things.  Gerry's is stars, abc beads and other colored beads more for a learning thing.   I really like the 2nd option though.  They like looking at it and I didn't glue the lids because when they look at it and are done, I pick them back up.


So what do you think?   Have you made these? 

Fun Molds for Play-Doh!


Playing with Play-Doh is always fun.  My kids love it and will play with it all day.  I have been meaning to try out a homemade version of play dough, but it is still on the to make list.  There are so many things in the store that you can buy to do everything you could imagine with Play-Doh from making pretend ice creams to molding vehicles.   we decided to go old school and use what we had.  I don't know about you, but I like to save on what I can rather than spending more on something we don't have to.  This is what we came up with for the kids to have even more fun with a toy that has more than just one play option.

http://onecreativeprocrastinatinggal.blogspot.com/
Plenty of options for fun there with the sand toys.  When they are done with all of the sand toys they can head straight into the yard for some dirt, water or sand fun.  Not much you can do after they mix the colors but they still have lots of fun.  We added eyeballs and little hearts to ours.   Actually, the kids pretended for the rest of the day that they were their pets and kept them in their clothes basket home.  They were super upset to find out that they had to pick them up and put them back in the containers because they would dry out.  They went to sleep and woke up the next day forgetting all about their pets from the night before. 

Kids and BuGs!

Target had a bunch of bug catchers on their $1 isle and I grabbed each of the kids one.  What kids does not love an opportunity to play in the dirt.  My daughter is more accepting of the worms and other bugs.  She says they are SO SWEET and SO CUTE. Funny! They went to collecting bugs around the yard.  It was actually really funny when I said okay go catch you some bugs and I look over and my 4 year old is jumping up and down trying to catch the bugs that were actually flying around.  Great laugh for the day.  I am so glad the weather is improving and the rainy days have died down...for now.

Googly Eyed Glasses

Check out these super cute googly eyed glasses.......all from pipe cleaners.   Here is your basic shape you are wanting to get.

http://onecreativeprocrastinatinggal.blogspot.com/

Grass Heads for Earth Day


Earth Day is on the 22nd so we decided we would start early on our Earth Day project.  

We gathered up our supplies: 


The Bare Spot Repair is like less than $5 at Walmart.
Potting Soil I got for like $3.
Potting cups-$2 for 9 cups.

The kids filled the cups 1/2 way and put a nice sized pinch of grass seeds in to make sure we have some extra grassy heads...and just incase some didn't sprout.  

Cover with soil until the top and water your soil.  We are watering ours daily right now. Nothing has sprouted yet, but it is getting warmer and they kids hope to transplant the grass in the yard hopefully by time Earth Day comes around.  They planted 2 each so they can glue a face on front & possibly give it a hair cut. 

Here are our cups and we promise to share once we have a nice cup of "GRASS HAIR."

What do you have planned for Earth Day this year?


Letter "A" Train Painting


The kids started painting outside and my son and I worked on Letter A for over a month and every time I would ask him what letter it was when shown and he said E every time.  I just left it alone for a while, because it was a tad frustrating.  Well, he says "Look Mom, Big A and Little A!"  I was super proud of him.  I suppose we can work on letter B now. : )

http://onecreativeprocrastinatinggal.blogspot.com/
 Even though it was a big and little uppercase, I was happy.  He is getting so big.

http://onecreativeprocrastinatinggal.blogspot.com/
Well, he just kept on painting and painting and somehow it turned into a train.  He actually painted it upside down.  I noticed it was a train while standing on the opposite side of him and I asked him where his other wheel for the train was.  

http://onecreativeprocrastinatinggal.blogspot.com/
He did not even realize he painted a train.  Double win there. 

Here is little misses painting....photo bombing cat....he was slapping the paint brush with his paw.  Both kids were painting and giggling because they thought it was so funny. 
http://onecreativeprocrastinatinggal.blogspot.com/


Don't you just love your kiddos creations? Do you have a photo bombing pet?

Art & Crafts with those Plastic Easter Eggs!


I do not know about you but in our house those lovely little plastic Easter Eggs are just one of those things you just keep finding throughout the months following the Easter holiday.  For some reason it seems like they are multiplying.  I found a way not only for us to have more fun with them, but I was able to dispose of the ones we used.  The kids can only re-hide the eggs over and over so many times before they are just over it.

http://onecreativeprocrastinatinggal.blogspot.com/

Jelly Bean Poem/Prayer/Verses and a Craft!


I like to make everything my own and by reviewing MANY of the same yet different ending poems/prayers here is the one that will be gracing its presence in our home from here on out during Easter.  I did add and remove some from the bottom section.

http://onecreativeprocrastinatinggal.blogspot.com/

Chick and Bunny Cup Craft

We made these cute little candy cups!  I actually took these last year and it was pre-blogger days and I had did this as a tutorial as a post for the Green Thumbs and Glue Guns sections as a tutorial for others in the moms forums.  Basic crafting...no instructions just pretty self explanatory in the photos.

http://onecreativeprocrastinatinggal.blogspot.com/

http://onecreativeprocrastinatinggal.blogspot.com/
The orange was the beek and the arms.  We used tape, because glue just didn't cut it.  

http://onecreativeprocrastinatinggal.blogspot.com/

My daughter and I did these together.  My son really could care less about this kind of stuff last year.  K finished the decorating and picked all the colors for the accessories.  Pink eye lashes on the little chicken...purple nosed bunny with pink and yellow whiskers.  Fun times right.  Love it!  

Copyright © Consider Me Inspired | Custom Blog Design by Lilipop Designs